Welcome to Teaching Students with Visual Impairments |
Keyboarding InstructionBy: Carmen Willings
teachingvisuallyimpaired.com Updated June 9, 2019 In order to prepare students for the workplace, they must be provided with the skills necessary to use computers competently. A necessary skill in using a computer is keyboarding and students must learn how to type quickly, accurately and with correct technique. One of the first steps in becoming proficient in technology and computer skills is to learn how to type on the QWERTY keyboard. Keyboarding instruction is an essential first step since the keyboard allows the students to control the computer, as well as to use it for writing and gathering information from electronic sources. Learning touch typing skills (typing without looking at the keys) will not only improve the student's speed and accuracy but will also minimize the need for the student to shift their gaze between the source, screen, and keyboard.
-Keyboarding instruction used to be introduced when students were older, but young children are being introduced to the computer earlier and earlier. Waiting until the student is in upper elementary grades or middle school to teach keyboarding is too late as most students will have developed bad keyboarding habits by that time. Although a point can be made that young children have not physically developed enough to learn to type, if they are using computers in pre-K and kindergarten classes, they will develop bad habits which will be hard to break. My philosophy is that it is important to begin instruction at this young age to avoid the development of bad habits as well as to get a head start on teaching access to digital print and to provide the student with a means to produce print that is legible to themselves and others.
A computer system with the appropriate adaptations (screen enlargement or screen reader) is an ideal tool for a student with a visual impairment to use to gain access to information and produce written communication. That being said, typing on a non-adapted keyboard and utilizing internal magnification will provide the student with the ability to type on any keyboard across environments. The rule of least amount of adaptations should be followed when determining what adaptations should be taught and used. Positioning is important when working on keyboarding skills. Encourage the student to sit up straight with their feet flat on the floor, elbows close to their body, wrists straight, and forearms level. Collaborate with the classroom teacher and request that the student is encouraged to use the correct positioning when typing throughout the day to support the instruction. It is important for the student to learn the position of the keys and to avoid visually searching for the various letters, numbers, and symbols. It is helpful to cover the keys so the student can’t look. Monitor the student and watch them closely and model correct form for them. Placing pressure on the younger student to attain speed will do them a disservice. Strategies I have used include placing stickers and decorative tape to cover keys and placing a sleeve over the keyboard. A computer teacher at one of the schools I previously worked at used CLEAN & NEW (This really is important!) boxer shorts as a “sleeve” to cover the keyboards in the computer lab. The student slips their hands through the pant openings to locate and type keys. There has been much research that supports the use of formal drills. Students must learn to not visually search for the keys. The technique is more important than accuracy and speed. The initial focus should be on using the correct fingers to type the various keys followed by a focus on accuracy and lastly on speed. Students must learn to use the proper finger for each letter, to have their wrists flat and their thumbs on the space bar. Teach drills to initially learn where the keys are, and then provide real practice. Be certain to make it fun and also incorporate meaningful activities and age/developmentally appropriate words, phrases, and sentences. Teaching keyboarding skills to kids using fun typing apps and games helps but it is important to use programs that are accessible to the student’s unique visual needs. During the lesson, it is important for students to not talk as it will interfere with the process of learning. If the student has a difficult time remaining on task, collaborate with the classroom teacher and parents to determine what strategies work in other settings. A strategy I have used that works well is to set a visual time. For students with low vision, this can be the built-in clock timer on the iPad. It can be propped beside the student and serve as a visual and auditory reminder of how much longer they need to type before they can take a break. Provide the student with a two to five minute break (or whatever amount is appropriate for your student). For students with low vision that need to work on visual tracking, visual motor or visual discrimination skills, you may consider allowing them to select from a computer game, iPad app or other activity that addresses these skills in a fun way. The student has fun and often times doesn’t realize they are continuing to work on visual goals! Do you have a number of students on your caseload that are learning touch typing skills? If they enjoy lighthearted competition, consider setting up a typing challenge. Create a chart with the student’s names across the top and the lessons down the side. Student’s can enter their best accuracy and compete against their peers. Be sure to find ways to reward each of them for their efforts and reward those who make the most improvement over a given period of time. Finally, practicing keyboarding at home can greatly improve keyboarding skill and retention. Just ten minutes of keyboarding a night on four nights a week will help improve the student’s keyboarding skills. Have the student practice typing reports, stories, poems, spelling words, completing assignments. The student will need instruction in the following areas:
Keyboarding Resources
Talking Typer for Windows This typing training software, available from APH, is a computer keyboarding and typing training program that speaks and displays lessons on screen. It includes drills, practice, and typing games and is adjustable to the student's level of skill and sight impairment.
This is a personal favorite of mine as it provides data on the student's accuracy and words per minute following each lesson. The lessons that come programmed into the program can be slightly monotonous and boring for students, but it is possible to develop individualized lessons. You can create lessons related to the current topic or the student's interest, and at the student's reading level. If you need support using the Talking Typer program, you can refer to the online User Manual. 
typio is a fully-accessible typing tutor from Accessbyte which guides student progress through learning the keyboard. It includes a set of 45 keyboarding lessons that are customizable and automatically keeps detailed records for each student.
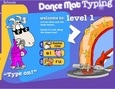
Dance Mat Typing is a free online program available from the BBC. It is most appropriate for younger students and those with enough usable vision to see the smaller font sizes. There are four levels to play, each divided into three stages. The student will start by learning the home row keys. Each stage builds on previous lessons, introducing new letters as the student progresses. At the end of each level, the student can test their typing speed and get a fun reward. The print size can be enlarged by using the CTRL and +, but if the student requires a significant amount of enlargement, the viewable area will be decreased.
Learn Keys: Verbal Keyboard Feedback
This PC keyboard exploration and announcement program, available from APH, gives you human speech feedback. This program works with several versions of Windows and with a variety of keyboard types. 
When practicing typing, it is important for the student to not look at the keyboard. You can cover the keyboard with a sleeve. Another option is to purchase SpeedSKIN keyboard covers that fit over the keyboard and are designed specifically for keyboarding instruction.
|
VI Assistive TechnologyBasic Use
Problem solve
Braille Notetaker
iOS/Tablet
Audio
Video Magnifier
Basic Computer Use
Access
Windows Keystrokes
Word Processing
Productivity
Online
|
|
Teaching Students with Visual Impairments LLC
All Rights Reserved 
|