Welcome to Teaching Students with Visual Impairments |
Low/Medium Tech Devices for Tactile LearnersBy: Carmen Willings
teachingvisuallyimpaired.com Students who are blind or visually impaired that use their tactual skills as a primary or secondary mode of learning will need tactual adaptations to materials in order for them to be accessible. There are a variety of low and medium technology devices that allow persons who are blind to access and produce braille, complete math activities and activities of daily living tactually. Braille Compass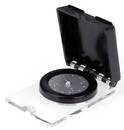
A braille compass allows a student who is blind to find North, South, East and West independently. This equipment is especially useful in Orientation & Mobility.
Braille Labelers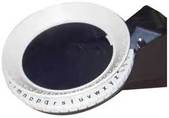
A braille labeler is an easy-to-use, handheld braille labeler that makes it easy for people who are not familiar with braille to create labels. Labels can be applied to medicine, food, documents, and more. The downside of these labelers is that they only create uncontracted braille.
Braille Watches
Braille watches are important for students who are blind and learning time management skills.
Bump Dots 
Bump Dots are ideal for persons who are blind or have low vision as they provide easy identification of items. These Bump Dots allow a variety of uses from tactile marking of everyday items such as computer keyboards, telephone keypads, multiple switches. Clear dots can be used so the view of keypad displays are not obscured. Black dot label are ideal for creating a contrast if placing on a white or light background or the fluorescent orange dots on patterned or darker backgrounds.
Cranmer Abacus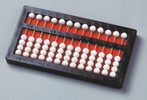
The Cranmer Abacus was especially adapted for individuals who are blind to complete math operations. An abacus can be procured through quota funds from the American Printing House for the Blind if you have access to quota funds.
Script Letter Board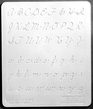
This Script Letter Board, available from APH, provides a way for students to explore upper and lower case cursive letters. Students can use a pencil or stylus to trace the incised script letters,
Full Page Writing Guide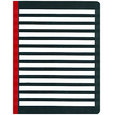
A full page writing guide can help students who are blind or have low vision to stay within the writing space.
Perkins Braillewriter
This classic Perkins braillewriter is a manually operated, six-key machine that, as its name indicates, is used to produce braille. Electronic and computerized braillers are also available that are more portable and lighter weight. This braillewriter is known for its durability and reliability and ability to write on wide paper and is my personal favorite! Although it is a bit heavy, I love the durability and quality of braille produced compared to the newer lightweight versions.
The Perkins website provides downloadable manuals that includes the machine layout and basic functions, instructions for the care and storage, inserting and removing braille paper, as well as brailling tips. Raised Line Paper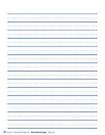
Raised line, or embossed, writing papers are not only great for teaching line orientation, and cueing correct letter and word spacing, but can be a helpful tool for students with visual impairments by providing sensory-tactile feedback. Raised-line paper comes in various formats, such as writing paper and graph paper, and allows a student to write script on the line or to construct a graph either by placing markers onto the graph paper or by punching holes to indicate specific points.
Signature Guide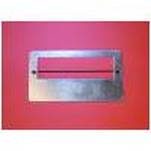
Although most guides available consist of simply a cut out rectangle in which to sign, this guide has a flexible rubber cord that marks a straight line but, unlike the standard rigid guide, flexes to accommodate letters that go below the line.
Slate and Stylus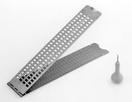
A slate and stylus is a portable way to produce braille. It can be easily carried in a pocket or on a clipboard. The slate is a metal or plastic frame with openings through which braille dots are embossed with the aid of a pointed stylus.
Work Play Trays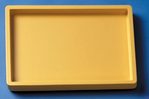
These work-play trays are available from APH. They are available in yellow and black. Dividers are available for sorting as well as to create inset puzzles to work on fractions. Trays can be used to help define the students work space as well as keep objects from rolling away. A "Hands ON" kit is also available through APH that is contains sturdy molded plastic trays with different dividers and sections to encourage sorting, categorizing and exploration. If you do not have access to APH materials, lunch trays can be used to define space. Place the trays on shelf liner or stick nonskid pads to the back to minimize the tray sliding around the table surface.
|
VI Assistive TechnologyBasic Use
Problem solve
Braille Notetaker
iOS/Tablet
Audio
Video Magnifier
Basic Computer Use
Access
Windows Keystrokes
Word Processing
Productivity
Online
|
|
Teaching Students with Visual Impairments LLC
All Rights Reserved 
|